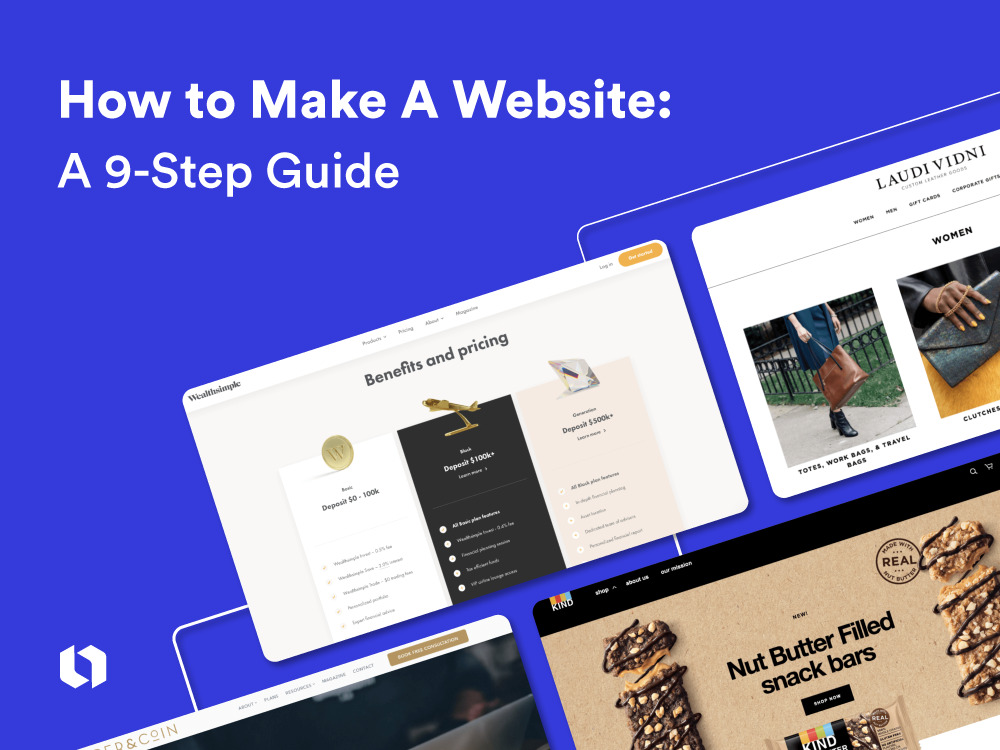
How to Make A Website in 2024: A Comprehensive 9-Step Guide
By Erin • 20 min read, Mar 14, 2023
Learning how to make your own website from scratch can feel like an enormous task, especially if you have limited technical knowledge. But don’t skip it! A website is your digital storefront, a central place for people to learn about your offerings, get acquainted with your brand, and contact you.
Whether you sell services or physical products, a website is a prime place to communicate and show what you have to offer.
Your website doesn’t have to be perfect when you launch it (hint: it won’t be!). But if you spend the time making it look legitimate while answering your customer’s most pressing questions, it’ll set you up for success. Remember, a website is different from a Facebook page. A website gives you full control over the content on your pages.
Here are nine steps to show you how to make your own website for a new business or project.
9 steps to making your own website
Let’s get into the easiest 9-step process to making your own website. We cover the costs involved and all the various options depending on your needs.

Step 1: Choose a business name and buy a domain
Assuming you know your business name, it’s time to buy a domain! A free domain won’t look trustworthy or professional, so it’s worth the investment!
Get a leg-up on search engine optimization by including the full name of your business in your website URL, ideally with the .com extension. So if your business name is Yummm Catering, look for yummmcatering.com.
How much does a domain cost?
Expect to pay approximately $20+ for a simple domain that may or may not have the .com extension. Costs go up if the name is shorter and snappier!
NameMesh is an excellent tool for checking your custom domain. Type in your company name and see if the .com address is available. If it is and doesn’t cost a fortune, you can purchase it from GoDaddy or another web host. Web hosting prices vary, but there are many affordable hosting options to explore.

If it isn’t available, don’t worry — you still have options. The first step is to go to the .com address and see what’s there. If it’s a company that would be in direct competition with your business, you probably want to rethink your name.
But if it’s a parked address or something unrelated to what you’re doing, you can:
- Try to buy the URL – If you really want the .com address, this could be an option. See if there’s contact information on the parked site and investigate. But be warned: this option could get expensive.
- Find another domain extension – Our business name generator is useful for providing other ideas for your domain using different extensions. There are regional ones like .ca or .uk, or more generic ones like .net, .org, or .io. See if any of these make sense for your company.
- Add a word at the start or end of your name to try to get the .com URL – Try adding words like “hello,” “get”, “app” to the start or end of your name. You could also try adding your product or service offering (smithopdesigns.com) or your location (smithoptoronto.com) if your customer base is local.
If you opt to use a website builder (more on that in Step 2), you could buy your custom domain directly from them. If you buy a domain somewhere else first, you can still connect it to website builders or a WordPress site.
Even if you’re not 100% ready to create a website, we recommend securing the domain if it’s available — it’s one less thing to worry about.
Got it? Onward.
Step 2: Decide how you’re going to create a website
Once you’ve picked your business name and secured an available domain, you have three main options for building your website:
DIY WordPress
Using a content management system (CMS) like WordPress is usually the cheapest DIY option, but often requires more setup than a website builder. You’ll have to purchase a domain and hosting provider separately (these will renew monthly or annually) and then connect them with WordPress dashboard to install a template, add content, and manage your site.
Cost to create a website: From $5 Basic to $59 Commerce priced monthly, billed annually. WordPress also has a free website option but doesn’t include your own domain name or premium templates and functionality. It’s a good option to test out a WordPress website!
Use a website builder
Using a platform like Squarespace, Shopify, Wix, or Looka’s website builder will cost a bit more than Option 1, but you get hosting, security, and more in one place for a monthly or annual fee.
A website builder usually provides a “drag-and-drop” editor, so you don’t have to write any code (phew!), and you get more customization options, including different templates and add-ons for functionality (more on that later).
Cost to create a website:
- Squarespace: $26 to $65
- Wix: $16 to $59 monthly
- Shopify: $5 to $299 monthly
Hire someone
Don’t feel confident creating a website on your own? You can hire a freelancer on platforms like Upwork. This will be a more expensive option than DIY but it can save you time and hassle. If you choose this option, you should still learn the basics of the platform your website is built on so you can make updates yourself.
The more you know, the easier it’ll be to tweak and optimize your site as your business grows.
Cost to create a website: From $5,000 to $10,000 in the first year for a simple professional website.
How much does it cost to create a website?
In terms of money and time cost, here’s what you’re looking at:
WordPress DIY – $5 to $59 for a domain, hosting service, and maintenance
Website Builder – $5 to $299 for a Domain, monthly/annual fees, and plugins
Web Designer – $5,000 to $10,000 in the first year for a simple and professional website
Decide on the next step and move forward — it’ll feel good!
Step 3: Plan your site structure

After you’ve done your research, it’s time to structure your website pages. Below we’ll cover the design for a service-based and a product-based website. Think about the most essential information your potential customers are looking for and make sure that information is easy to find.
Kick off your website planning process by looking at the types of websites in your industry to see how their information is organized. You’ll see patterns in what content is included and what makes a good or not-so-good customer experience.
Start with the basics — when you create a website, these are the three most essential web pages to have:
Homepage
Write a concise description of what you do and how you help people (think mission statement!) at the top of your homepage. Include at least one call to action (CTA) button or link. Examples:
- Get in touch or Request a quote that leads to an email form
- Book a call that connects to a scheduling tool (or an email form)
- Shop now that goes to a category page of products
- Work with me which goes to a page that explains your services, process, and pricing
- Sign up for updates if you’re in the pre-launch phase of your business and want to capture email addresses
Beyond the messaging and CTA on the homepage header, decide what other information you want to include on your homepage. You could include benefits of your products or services, how it works, or testimonials from customers.
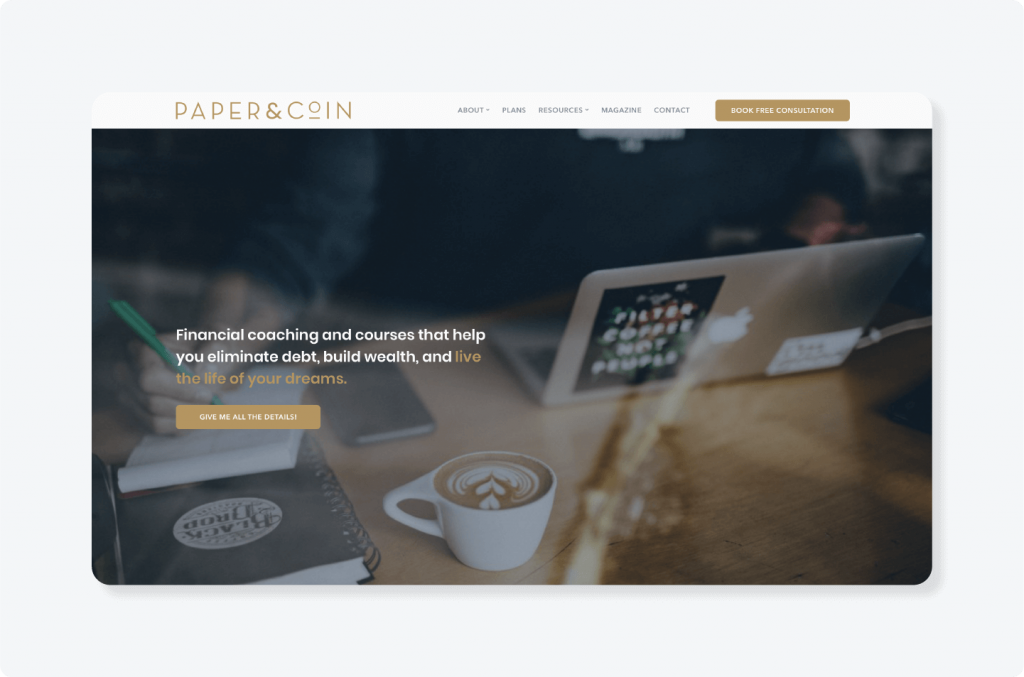
Source: paperandcoin.ca
About page
Tell your story! This page expands on your mission, explains why you started your business and outlines your expertise and credentials. You can also include contact information on this page or create a separate contact page (see below).
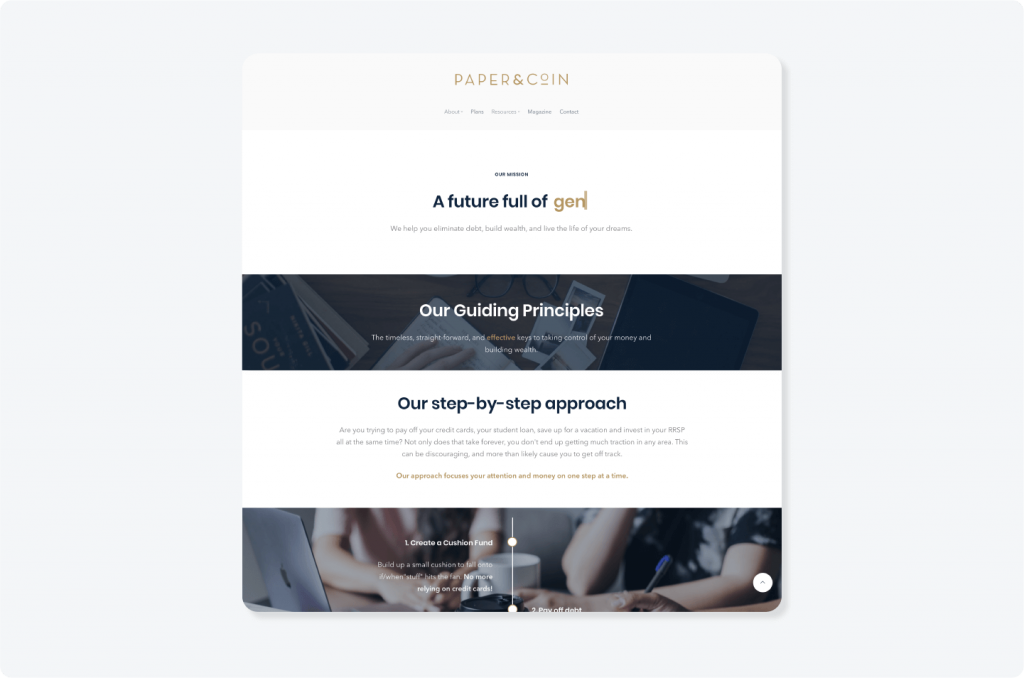
Source: paperandcoin.ca
Contact page
You can include contact information on your About page or build out a separate page if it’s more important (for example, if you run a cleaning service who wants to generate leads through your website.) Most contact pages include a form that connects to your email address. You can also show a phone number, physical address, and hours of operation if relevant to your business.
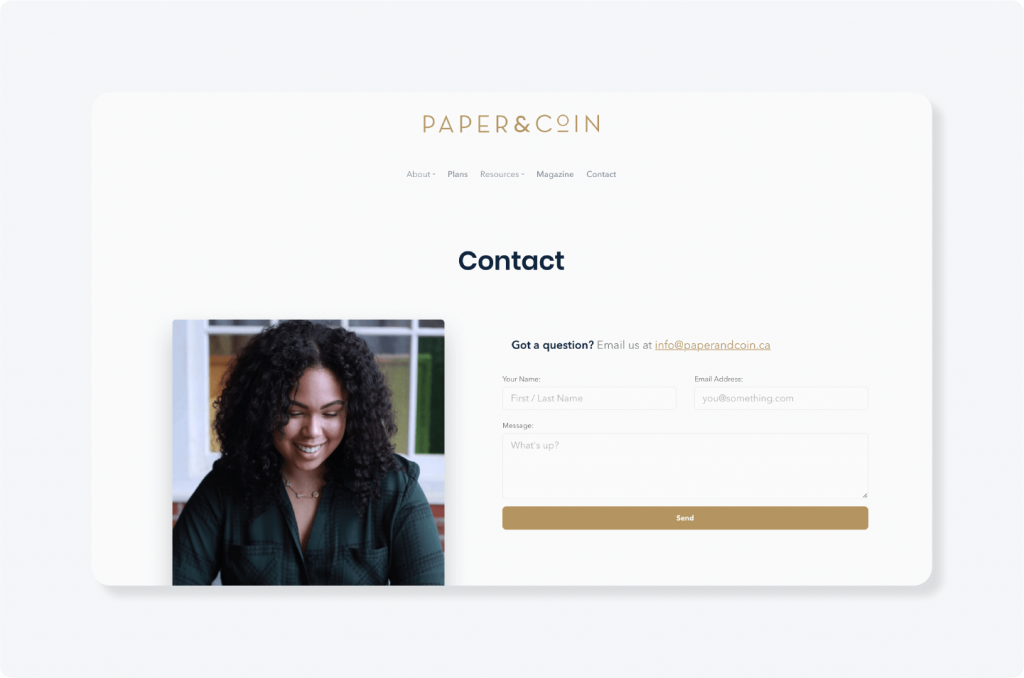
Source: paperandcoin.ca
If you own a service-based business…
Services/Pricing/Plans page
Outline all the services you offer and the benefits of each — remember, it’s all about how you help the customer. If you provide packages or plans, such as a personal training or coaching package, include the pricing on this page.
If you charge custom or hourly pricing, you can ask visitors to contact you for pricing or book a consultation or put a “starting at” price. Remember: most people are looking for pricing information online and will be frustrated if they can’t find it!
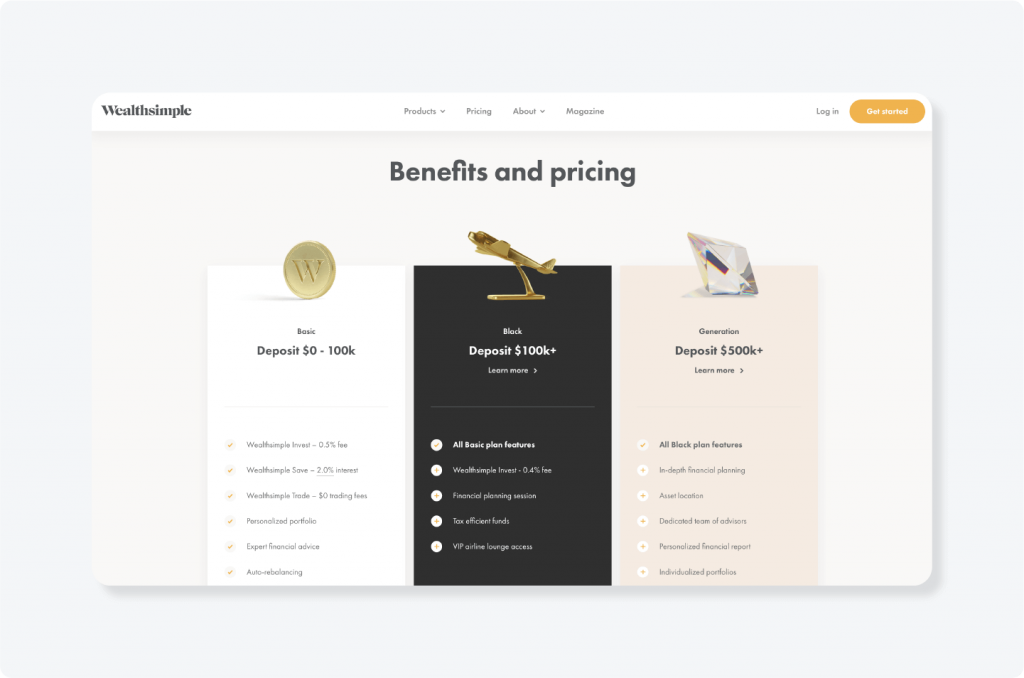
Source: wealthsimple.com
If you own an ecommerce business or online store
Product and category pages
If you’re running an ecommerce business, product pages are the meat of your website. You need to include:
- Professional imagery
- Product descriptions
- Product attributes
- Pricing
- Reviews
- Video tutorials
- Shipping information
- Buy now or Add to cart button
If you’re selling many different products, create category pages to organize them. For example, if you own a jewelry business, you can have category pages for necklaces, earrings, rings, etc., with individual product pages under each category.
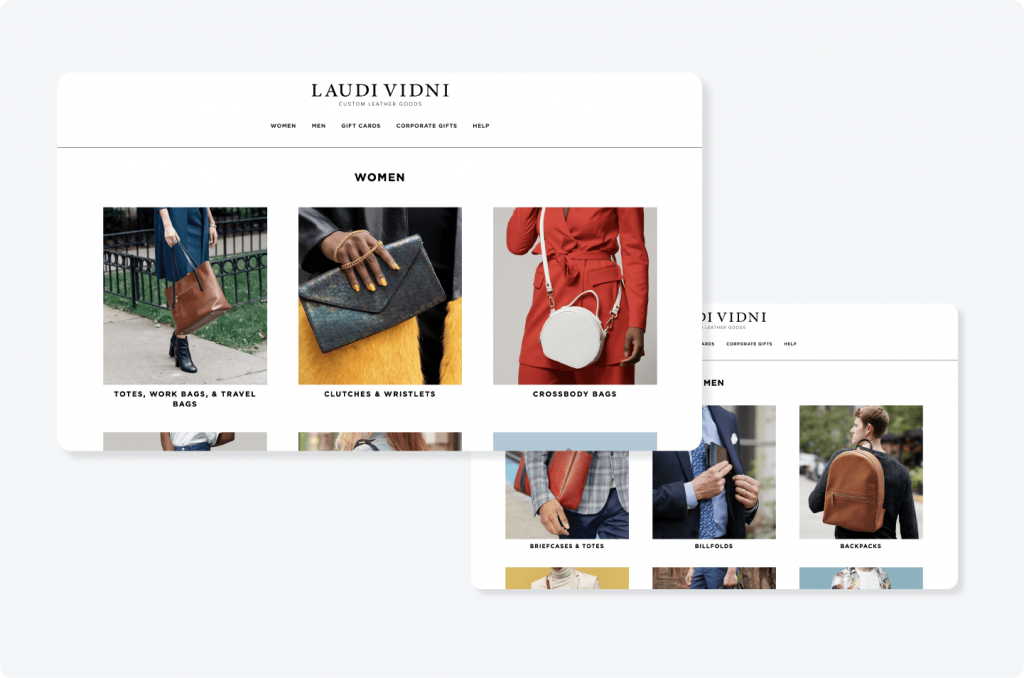
Source: lauravidni.com
Other webpages to include
- Portfolio, case studies, or testimonials/reviews: This page demonstrates your work and how you help people achieve results.
- Frequently asked questions (FAQs): Clarify your products, services, or shipping/return policies with FAQ’s.
- Privacy policy: If you’re collecting personal data from users (in an email newsletter signup form), you’ll need a Privacy Policy.
- Blog page: A blog is an excellent way to build organic traffic to your site, show expertise on a particular topic, and keep the content of your website fresh.
After you’ve planned out your pages, you’re ready to choose a theme and start writing!
Step 4: Choose a theme or template
If you’re using a CMS or website builder, you have the fun task of picking a theme or template for your site. If you’re working with a designer, give them an idea of the designs you like by showing them examples.
What are website themes?
Website themes are pre-made web page designs that you can add your content to; they’re made up of fonts, color schemes, patterns, and other aesthetic and functional components. All you have to do is populate it with your own content!

Many free website themes are available on website builders. Depending on the web hosts, you can also buy a “premium” theme from a third-party vendor.
You can customize themes to an extent, but it can be tricky if you’re a non-technical person. So, pick a design that fits with your website’s content and appeals to your target audience. Here are some questions to answer when choosing a theme:
What type of website are you creating?
It all comes down to the industry you’re in, the audience you’re targeting, and the primary purpose your website is going to serve. For example:
- Are you a tutoring business that needs to create a website to explain various packages and share contact information?
- An ecommerce business/ online store selling products directly to customers?
- A not-for-profit that needs to tell stories, explain its mission, and accept online donations?
- A travel blog that wants to attract subscribers with beautiful photography?
- A professional who needs a portfolio to show off their work and attract clients?
Look at types of websites with businesses similar to yours for inspiration and take note of the website designs you like. You’ll get a better idea of what you’re looking for in a website theme.
How do you want your homepage to look?
Your homepage is the centerpiece of your website — it has to make an impact by communicating what your business does. Keep in mind page speed is critical here because visitors will leave if the page isn’t loading.
Static imagery is the simplest choice and will work for most businesses. However, if you’re offering multiple services or product categories, try columns of images or an image carousel.
Add a call to action or mission statement in the header — It’s important to indicate how you can help!
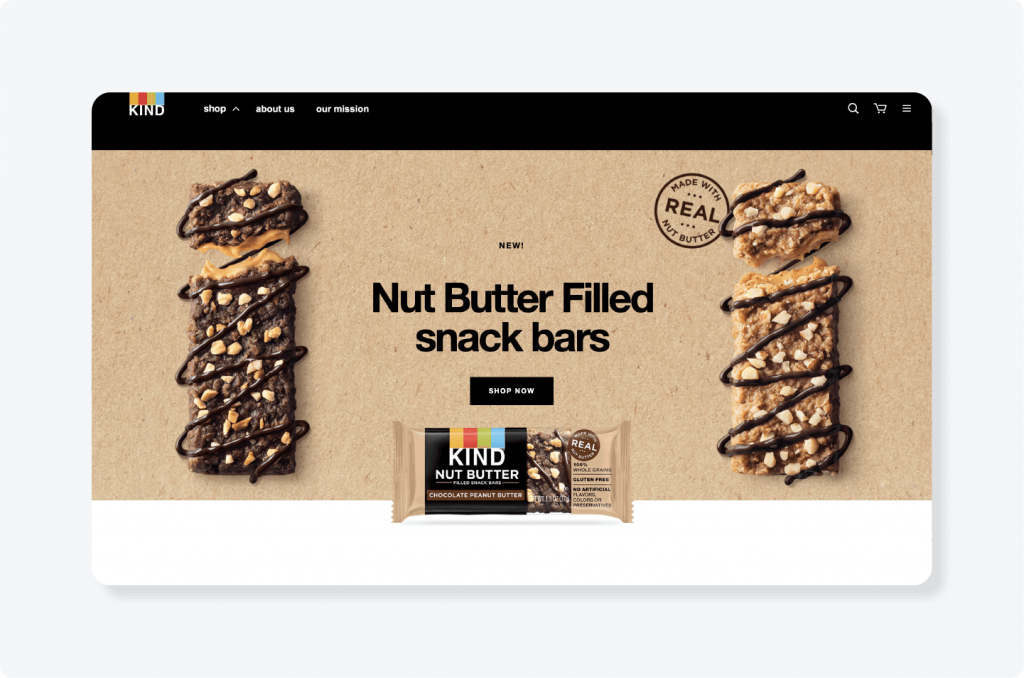
Source: kindsnacks.com
How do you want your navigation to look?
Depending on how many pages your website has (see Step 3!), decide if you want your navigation menu to be horizontal across the top of the page (as seen above), vertical on the side, or hidden in a drop-down menu.
How do you want your logo to appear?
While the top left is the most popular (and safe) place to put your logo, you may prefer it in the center of your website header if you want to focus on brand awareness. Make sure the logo is big enough to read clearly!
Is the theme responsive/mobile-friendly?
With mobile traffic on the rise, you’ll want to make sure the theme you choose is responsive and adapts to different screen sizes.
Once you’ve answered these questions, it’s time to create a moodboard of themes that meet your requirements. Then, you can then move on to the next steps: planning your site structure and populating your site with content!
Create a logo you love, then start building your dream website!
Step 5: Write copy and calls to action
Writing website copy from scratch can be tricky — especially if you haven’t researched your target market or figured out what makes your business different.
The good news? With your theme chosen and your wireframe complete, you have a roadmap to the pages you need to write content for. We recommend setting up a project plan in a tool like Notion (or even a notebook or spreadsheet) to move your pages along in the process:

The most important thing to remember when writing your website copy is that you’re talking to your potential customers. You want your online brand voice to sound friendly, conversational, and genuinely interested in helping your customer.
Here’s how to write website copy that resonates:
- Create a buyer persona. Fill out their age, occupation, gender, likes, and dislikes, fears, and hopes. What motivates this customer? Why do they need or want your product or service? Use this to guide your choice of words and visuals.
- Pick a target keyword for each web page. Do keyword research on Google to find out what terms people are using to find your product or service. For example, the target keyword for your home page could be “portrait photography Newark” or “natural deodorant.”
- Keep each page focused on one specific objective. Website visitors are task-focused and easily distracted. Your copy should answer your users’ most pressing questions and prompt them to take action.
- Spend the most time on your homepage — remember to speak to your audience and keep it simple, using the word “you” more than “us” or “we.”
- Be clear on your services or product pages. With your buyer persona in hand, talk about your customers’ needs or pain points, and present a solution that highlights the results and benefits. They should know exactly what you’re offering!
- Don’t forget calls to action! The easier it is for users to take the next step, the better. (e.g. Book a call, Shop now)
- Edit! Run all your copy through a tool like Grammarly to ensure you don’t have any glaring spelling or usage errors.
Writing “technical” pages
If you’re stuck writing Terms & Conditions page or a Privacy Policy (Required if you’re collecting personal data from users), go to TermsFeed to find free templates or generate an agreement that meets your business needs.
Got drafts of all your pages? Start populating your content into your website builder or CMS. We’ll also cover SEO tools and how to optimize your website in Step 7.
Step 6: Source and add visual content
When it comes to websites, a good visual identity is a must. It’ll help break up your text so you don’t overwhelm visitors! Based on your wireframes and copy, you should have a good idea of how many images you’ll need and where they’ll go on your web pages.
Here are four types of imagery to keep in mind :
- Photos: If you’re a service-based business or blogger, you’ll need a professional headshot and photos that demonstrate your work. If you’re an e-commerce site, decide if you’re going to hire a photographer, use vendor-provided images, or take photos on your own.
- Logo: You’ll need a PNG version of your logo for your brand identity and website logo. Use our Logo Maker to easily create your logo and branding. Don’t get stuck on this step and delay your website launch!
- Graphics: Want some icons and graphics? Head to unDraw for an extensive collection of free illustrations or Creative Market for low-cost graphics, themes, fonts, and photos.
- Videos: If you have a promo or explainer video that shows how your product or service works, you can host it on YouTube (or Vimeo and Wistia) and embed the link in your website.
Tip: Once you have your brand colors and fonts, you can apply them in other places on your site. Or you can opt for our website package to have all of this done already. , like headings or call-to-action buttons.
Got copy and images in your template? You’re ready to edit and optimize!
Step 7: Optimize for search engines
SEO is the process of ranking for a keyword or set of keywords in a search engine result pages (also called a SERP). It’s also called “organic search” because it doesn’t involve paying for keywords.
In short, it’s about finding keywords related to your business that are also relevant to your audience, then creating a website that’s optimized for those terms. You might call your services or products one thing, but is that the way your target customers search for them? It’s always best to check your assumptions.

SEO is a BIG topic — but here are a few basics for optimizing your website:
Conduct basic keyword research. Use a free tool like Keywords Everywhere to see what keywords other sites in your industry are using. Keyword research helps you come up with content ideas if you decide to publish a blog.
Find one target keyword for every page of your website. Choose long-tail keywords — ones with 3-4 words — They often contain phrases like “how to”.
Put your keyword in the right places. How you add SEO to a piece of content depends on the website builder or CMS you’re using, but if you search “how to add a page title in XX,” you should be able to find the answer. Make sure your keyword is included in these five spots:
- Page title – The page title is what shows up as the title in your Google Search Results and on the tab at the top of your browser, and it’s the most important place to put your keyword! Keep it to 55 characters.
- Meta description – Meta descriptions show up as the page description in your search engine results pages (SERPs). Keep to 155 characters.
- URL – This is the text that shows up in your search/navigation bar – the end of the URL usually will tell you what the content is. Use hyphens to separate words, e.g. smithopdesign.com/interior-design-services-boston
- Image alt tag – Alt tags describe the image. They’re a helpful spot to add keywords. Especially for products. (e.g. red tennis shoes).
- On-page copy – Headings show up on the page as headlines and subtitles. It’s also a good idea to include your keyword where it fits naturally in your body copy.
SEO can be daunting if you’re a beginner, but completing these basic steps to get your site launched will help put you on the path to ranking for keywords your audience is searching for. And you can always continue to optimize your site after it’s launched — in fact, we highly recommend it!
Step 8: Add the functionality you need
If you’re running a basic informational website, you can skip over this section. But if you want to add a technical component like ecommerce or online booking, you’ll probably need to add a plugin, widget, or app depending on the website builder and template you’re using.
We have an exclusive offers marketplace for our Brand Kit users that gives them free trials and discounts. Check out our Exclusive Offers Marketplace!
Some functionality to consider:
- Online payments – For customers to purchase products or services through your website check if you need to set up an account with a payment gateway like Stripe or PayPal to process payments.
- Online booking –Get vsitors to instantly book appointments or time with you online. Research appointment scheduling systems or plugins like Calendly or SimplyBook.

- Lead capture – Collect email addresses, either by asking visitors to subscribe to your newsletter with a widget like Mailchimp.
- Forms – Similar to lead capture, this is for if you want your visitors to fill out a form to get more information before you contact them.
- Google Maps – To show your location on a map (if you’re a brick-and-mortar business) or show stores that sell your product.
- Social media feed – To pull in your Instagram social media handle or Twitter feed at the bottom of your website.
- Security – This is important if you’re launching a WordPress site that doesn’t automatically include an SSL certificate. Find a plugin that can support this.
You can add many more plugins or add-ons, but it’s best to keep things simple, especially when you start out.
Step 9: Test, tweak, and launch!
After you finish uploading copy and images to your website builder, preview how each page looks and take the time to read the copy carefully and click on all the links.
It may take some experimentation and tweaking to get things looking the way you want them (it’s also common to want to change copy once you see it in a design).
A few questions to ask yourself before launching your website:
- Does every page have a call to action?
- How does your website look on different devices?
- Does it look good on different browsers?
- Do all buttons and links work and go to the correct pages?
- Are all the images loading quickly and correctly?
- Is your logo clear and in the right position?
- Is the favicon (the small image beside your URL) working?
- Have you proofread all the copy?
- Are all forms working and going to your correct email address?
- Have you enabled ecommerce and tested the checkout flow?
- Have you written page titles and meta descriptions for every page?
After you’ve run through all these questions, make a list of tasks to complete before launch, prioritizing them from high to low.
Let’s face it — there’s always going to be one more thing to add or improve on your website. The upside of pushing it live is that you have more incentive to optimize it because it’s out in the world.
As one of our customers said, “It’s hard to get your website 100% perfect the first time. So don’t. Get it 60-80% right and then release. Get it live! You can make amends along the way.”
Once your website is live (yay!), here are some basic things you can do to promote and track it:
- Send it to your family and friends/share it on your personal social channels
- Add the URL to your social channels
- Add the URL to your email signature
- Set up Google Analytics to track your numbers — here’s how to do it.
To keep the content on your website fresh, schedule monthly or quarterly reviews to refresh your copy, check your links, and see where you can make improvements.
An up-to-date website will help you drive more traffic, connect with more customers, and rank in search engines — all things that are essential for growing a business. Make it a priority and give yourself a huge pat on the back when it’s launched!